Are you having a hard time coming up with the perfect gift for a special occasion, or are you looking for a gift idea that you can put your unique signature on? Look no further than your own closet. Upcycle those old blue jeans into a beautiful wine bottle gift bag to package a great bottle of cheer.
Yes, you will still need to purchase a bottle of wine, but packaging it in one of these unique bags will elevate it from ho-hum to a fun conversation starter. This beautiful bag can and will be reused by recipients for years to come.
Deconstructing Your Blue Jeans-
Depending on the project you are undertaking, there are many ways to deconstruct jeans. This deconstructing tutorial is specific to this project. Note: The wine bag uses many sections of a pair of jeans, but will not use all of the jeans. You will have parts left over that can be used for another bag or another project.
Step 1:
Cut off one leg from the blue jeans, just below the crotch.
Step 2:
Cut up the length of the leg on each side of the flat-fell seam to remove. Note: The flat-fell seam is the seam that has two parallel stitch lines. Set the seam aside. It will not be used for the wine bag, but is a great element to use on other projects.
Step 3:
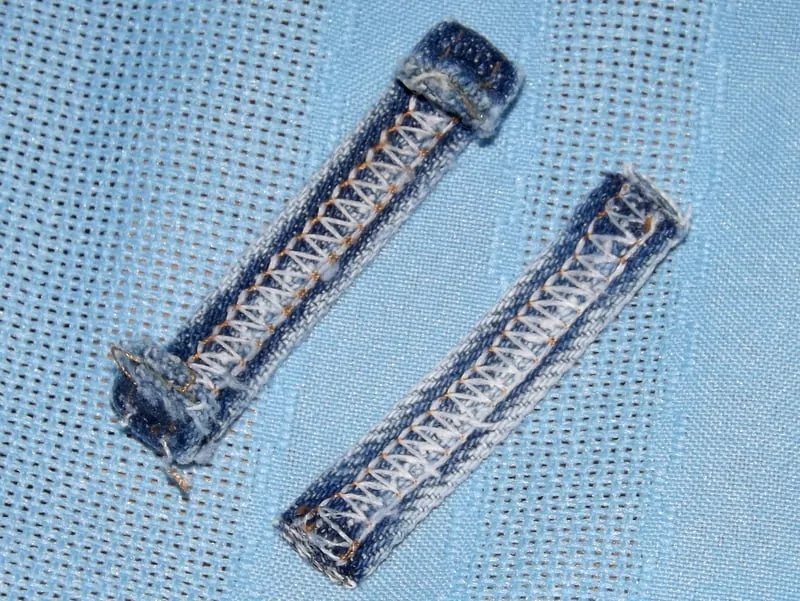
Using a seam ripper, remove each of the belt loops from the waistband. Set all but two loops aside. Cut off the folded ends from the two remaining belt loops to remove bulk. This will make sewing through the loops much easier and will lessen the probability of breaking a needle.
Step 4:
Using the seam ripper, remove any labels that may be attached on the inside or the outside of the waistband. Set the labels aside. They will not be used, but again, they will make fun embellishments on other projects. Unbutton the waistband. Starting on one end, cut just below the band, all the way around to remove.
Step 5:
Cut around one back pocket. Include the fabric from the seat of the pants in the cut. The pocket will resemble a pouch.
Wine Bag Instructions
Things You Will Need:
- Old blue jeans, adult-size
- Home decor fabric, scrap
- Scissors
- Seam ripper
- Ruler
- Straight pins
- Sewing machine
- Sewing machine needle, heavy duty/jean
- Matching thread
- Iron
- E-6000 adhesive
- Masking tape
- Twine or string
- 6mm jute cord
Special Notes:
*This wine bag tutorial not only gives you a way to upcycle old jeans, but also provides a use for scraps of home decor or upholstery fabric. Medium weight fabrics can also be used, but anything lighter may not hold its shape well.
*The measurements given are for a standard 750 mL bottle of wine. To modify for a larger bottle, add to the 13” measurement of the body and lining rectangles.
What To Do:
Step 1:
Open the leg and lay flat. From the hem end, cut a 3″ x 13″ strip with the hem on one 13″ side. This is the bag’s cuff.
Step 2:
From the same leg, cut one 13″ x 15″ rectangle. This is the bag’s lining. Cut another 13″ x 15″ rectangle from home decor fabric. This is the body of the bag.
Step 3:
Not including the ends of the waistband (buttonhole and button), cut two 10″ lengths from the waistband. These are the bag’s handles.
Step 4:
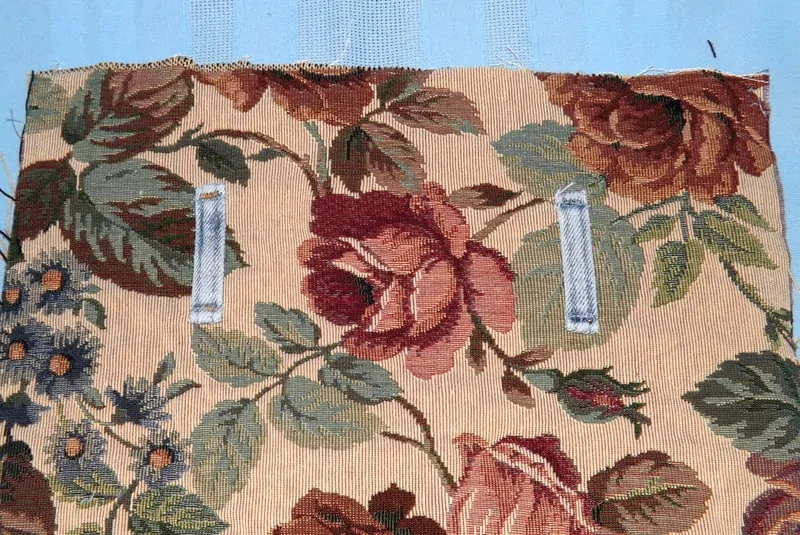
Lay the body rectangle on your work surface with the right side facing up and the 13″ edges running horizontal. The 13″ edges are the top and bottom of the bag. Vertically place belt loops 2 1/2″ down from the top edge and 3 1/4″ in from the 15″ side edges and pin. Top stitch over each end of the loops to attach.
Step 5:
Fold the body rectangle (home decor fabric) in half with the right sides together and the 15″ edges matching. Pin the 15″ edges together. Sew the pinned edges using a 1/4″ seam allowance. You now have a tube. Lay the tube flat with the seam running down the center of the side facing up. This is the back of the bag. Open the seam and iron flat. Pin one end of the tube and sew using a 1/4″ seam allowance. This is the bottom.
Step 6:
For the bag’s lining, repeat Step 5 with the jean rectangle. Leave a 3″ opening in the center of the long back seam.
Step 7:
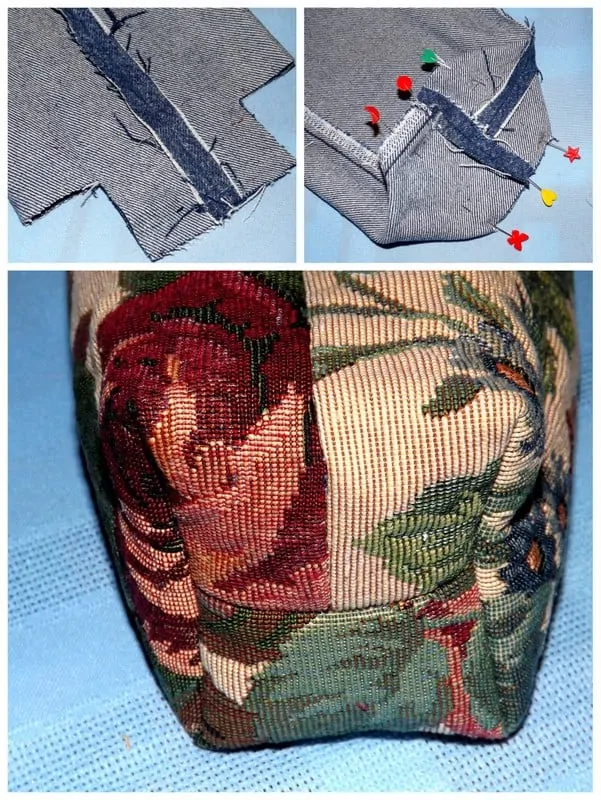
Create a boxed bottom. Lay the bag lining on your work surface. Cut out a 1 1/2″ square from each bottom corner. Open the lining. On one corner, diagonally match the edges of the cut square and pin. Sew using a 1/4″ seam allowance. Repeat on the other corner. DO NOT TURN the lining right side out.
Step 8:
Repeat Step 7 with the bag’s body. TURN the body right side out.
Step 9:
Fold the wine bag’s cuff (3″ x 13″ jean strip with hem) with the right sides together and the short ends matching. Pin the short ends together and sew using a 1/4″ seam allowance. Open the seam and press. Turn the cuff right side out.
Step 10:
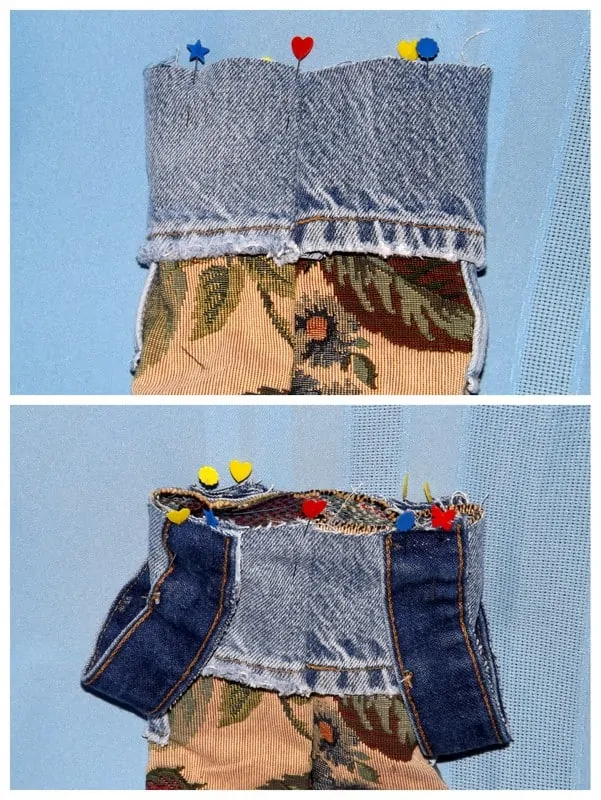
Place the right-side-out cuff over the top of the right-side-out body. Match the top, cut edges and the back seams of both the body and the cuff. Pin the top edges together. Do not sew.
Step 11:
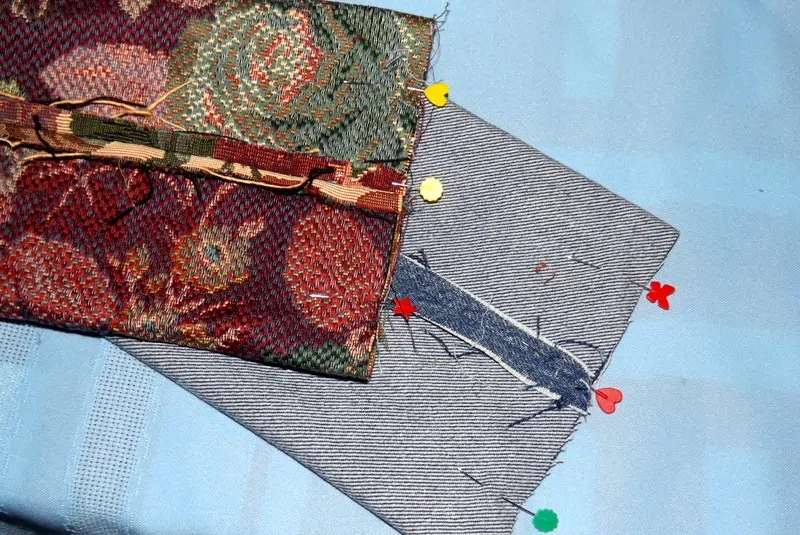
Lay the body of the bag flat. Measure in 1/2” from one side fold. Attach the end of one handle to the top edge with the rest of the handle hanging down. Measure and pin the other handle to the opposite side in the same way. Flip the bag over. Measure and pin the other ends of the handles in the same way, being careful not to twist the handles. Do not sew.
Step 12:
Insert the right-side-out body into the wrong-side-out lining, sandwiching the pinned cuff and handles in between. Pin the top edges together. Sew around the top edge using a 1/4″ seam allowance.
Step 13:
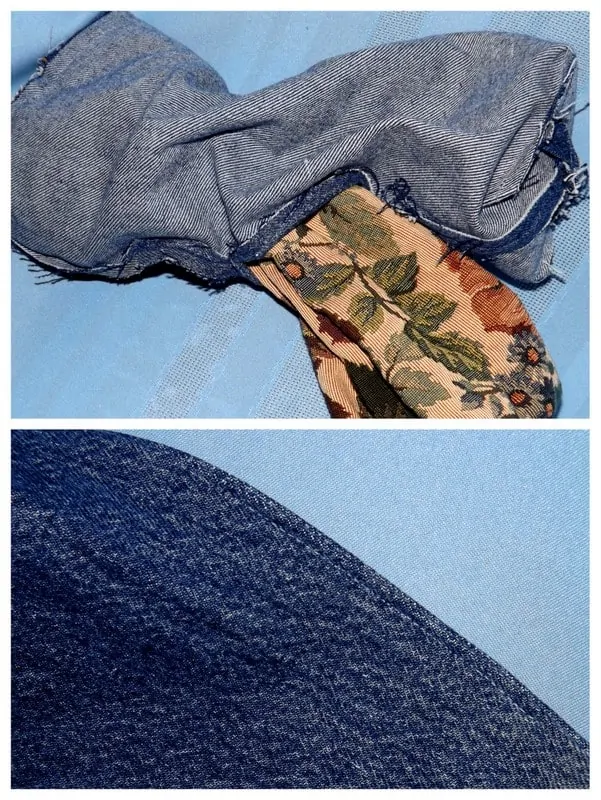
Turn the bag right side out through the 3″ opening in the lining. Pin and sew the opening closed using the sewing machine. Push the lining inside the bag. Press the top edge to smooth the fold and seams.
Step 14:
Lay the bag flat on your work surface with the front facing up. Center the back pocket between the long sides and 4 1/2” down from the bottom of the cuff. Fold one half of the pocket over and apply E-6000 along the back edge and over the back of the pocket. Fold the pocket down and press to the bag. Apply masking tape along the edge to hold until the adhesive has dried. Repeat on the other half of the pocket to secure. Allow the adhesive to dry overnight and remove the tape. This is a great pocket for inserting a card, corkscrew or decorative bottle cork.
Step 15:
Rip a 1/2″ x 20″ strip from the remainder of the jean leg. Cut a 6″ piece of twine. Wind the jean strip around four fingers on your hand, three times. Slide the strip off and pinch in the center. Wrap the twine around the pinch and knot to secure. Cut open the jean loops and separate to form a raggedy tassel bow. Trim the ends as desired. Use a safety pin to attach the bow to the front of the bag at the base of a handle.
Step 16:
Cut a 36″ length of 6mm jute cord. String it through the belt loops on the bag and tie in the front. Tie knots on each end and unravel. Note: If desired, a loose cinch of the jute will allow a wine bottle to be inserted and removed without untying.
Make It Your Own
Give this bag your own personal touch. The best part of a DIY is the maker’s own interpretation. While this example was made using a fabric with colors that evoke an Old World, vineyard vibe, you can choose fabrics that match the recipient’s personality or the theme and color of a holiday or celebration. If desired, leave off the handles and in place of the tassel bow, add a charm, buttons or nothing at all.
What Goes Around, Comes Around
Present your bag of cheer as an anniversary, birthday, housewarming or hostess gift, and wait for it to make the rounds back to you with a gift for your own special day.

